Welcome to our comprehensive guide on Shoe Rack Plans PDF! This detailed resource helps you create functional and stylish shoe storage solutions․ Discover step-by-step instructions, material lists, and expert tips to organize your space efficiently․ Perfect for DIY enthusiasts of all skill levels․
Measuring and Planning Your Space
Before diving into your DIY shoe rack project, it’s essential to measure and plan your space carefully․ Assess the area where the shoe rack will go, considering the height, width, and depth available․ Measure the length of your wall or the dimensions of your entryway, closet, or hallway to ensure the rack fits perfectly․ Think about how many shoes you need to store and their sizes, as this will influence the design and number of shelves or compartments․
Next, sketch a rough layout of your space and mark where the shoe rack will be placed․ Consider the style of your room and how the rack will blend with the existing decor․ Measure the shoes themselves to determine the ideal shelf height and spacing․ For example, high heels may require taller compartments, while flats or sneakers can be stored more compactly․
Plan for future needs as well—will you need additional storage for new shoes? Leave some extra space for flexibility․ Finally, double-check your measurements to avoid errors during construction․ Proper planning ensures your shoe rack is both functional and aesthetically pleasing, making the building process smoother and more enjoyable․
Benefits of Using Shoe Rack Plans PDF
Using a Shoe Rack Plans PDF offers numerous advantages for DIY enthusiasts and homeowners alike․ These plans provide detailed, step-by-step instructions, making it easier to build a shoe rack tailored to your specific needs․ With a PDF guide, you can access clear diagrams, material lists, and measurements, ensuring accuracy and minimizing errors․
One of the key benefits is the ability to customize the design to fit your space and style․ Whether you prefer a modern, minimalist look or a rustic, traditional design, PDF plans allow you to adapt the project to match your home decor․ Additionally, these plans often include cost-saving tips, helping you stay within your budget while creating a functional and attractive storage solution․
For beginners, the comprehensive instructions and visual aids in the PDF make the process less intimidating․ Experienced DIYers will appreciate the flexibility to modify the plans for unique or complex spaces․ Overall, a Shoe Rack Plans PDF is an invaluable resource for anyone looking to organize their shoes efficiently and enhance their home’s storage capabilities․
Materials Needed for Building a Shoe Rack
Building a shoe rack requires a variety of materials to ensure durability and functionality․ Typically, you’ll need 3/4 plywood for the main structure, with specific dimensions depending on the design․ For example, sides may require pieces measuring 15 1/4 x 91 3/4 inches, while frames might need 33 1/2 x 15 1/4 inches․ Additional components like shelves, supports, and backing are also essential․
Other materials include 1×6 and 2×2 boards for added structural integrity․ Scrap wood can be repurposed for a budget-friendly option, and some plans incorporate cardboard for a lightweight, eco-friendly alternative․ Sandpaper, screws, nails, and wood glue are necessary for assembly and finishing․ Optional enhancements like paint, varnish, or a shou sugi ban finish can add style and protection to the wood․
These materials are readily available at hardware stores and allow for customization to suit your space and preferences․ Whether you’re aiming for a modern look or a rustic vibe, the right materials will ensure your shoe rack is both functional and visually appealing․
Tools Required for the Project
Building a shoe rack requires a set of essential tools to ensure accuracy and efficiency․ Start with a drill/driver for screwing pieces together and a circular saw or table saw for cutting wood to the desired dimensions․ A sander is necessary for smoothing out rough edges and preparing the surface for finishing․
Measure and mark materials accurately using a tape measure and square․ Clamps will help hold pieces in place while gluing and screwing․ Safety gear, such as safety glasses and a dust mask, is crucial for protecting yourself during cutting and sanding․
Optional tools include a Kreg jig for creating pocket holes and an impact driver for heavy-duty screws․ These tools will help you construct a sturdy and professional-looking shoe rack․ Having the right tools ensures a smooth and successful DIY experience․
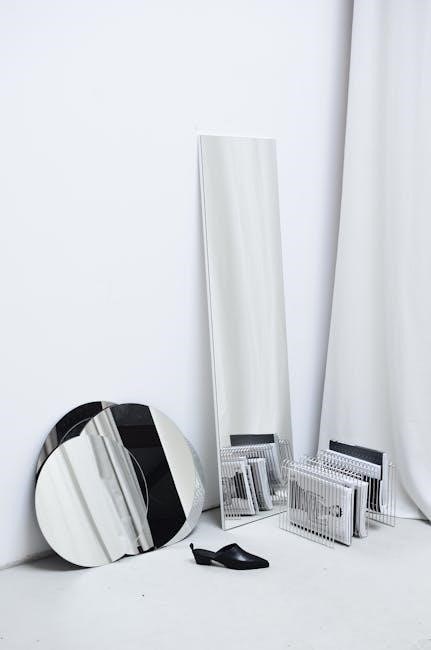
Types of Shoe Racks You Can Build
You can build wall-mounted, standalone, or hanging shoe racks․ Each type offers unique space-saving solutions․ Plans include designs for compact, multi-tiered, or customizable shoe storage to suit your needs and preferences․
6․1․ Wall-Mounted Shoe Racks
Wall-mounted shoe racks are a fantastic space-saving solution for organizing your footwear․ They can be installed directly on any wall, making them ideal for small rooms, entryways, or closets; These racks are typically made of wood, metal, or a combination of materials, offering durability and style․ Many DIY plans include adjustable shelves or compartments, allowing you to customize the storage to fit your shoe collection․ Wall-mounted racks are easy to install, with most requiring only basic tools like a drill and screws․ They are also versatile, as they can hold shoes of various sizes, from sneakers to heels․ Additionally, some designs feature decorative elements, such as finishes or trim, to match your home decor․ This option is perfect for maximizing vertical space while keeping your shoes neatly organized and within reach․ With step-by-step instructions and material lists, building a wall-mounted shoe rack is a manageable project for DIY enthusiasts of all skill levels․
6․2․ Standalone Shoe Racks
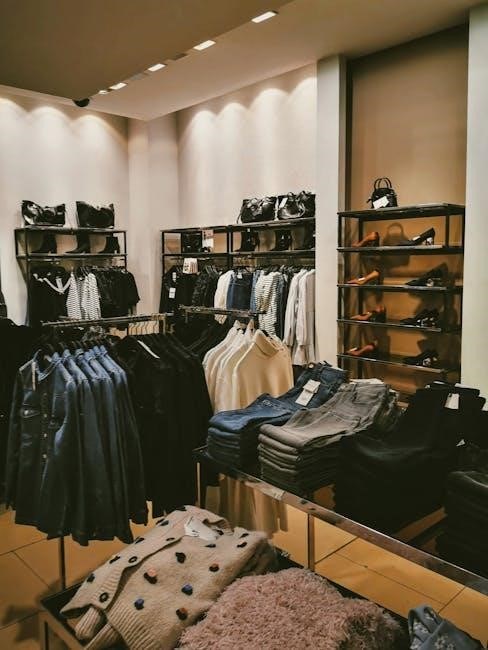
Standalone shoe racks are a versatile and practical option for organizing footwear․ Unlike wall-mounted designs, these racks can be placed anywhere in the room, offering flexibility in placement․ They often feature multiple tiers or compartments, allowing you to store a variety of shoe sizes and styles․ Many standalone shoe racks are designed with a focus on durability and aesthetics, making them a functional and attractive addition to any space․ These racks can be constructed from wood, metal, or plastic, depending on the desired style and budget․ Some plans include wheels or casters, enabling easy mobility․ Standalone shoe racks are ideal for those who prefer a self-contained storage solution that doesn’t require wall installation․ They are also a great choice for renters or those who want to avoid permanent changes to their space․ With a wide range of designs available, you can choose a standalone shoe rack that complements your home decor while keeping your shoes tidy and accessible․
Design and Space Considerations
When designing a shoe rack, it’s essential to consider the space where it will be placed and the overall aesthetic you want to achieve․ Measure the area thoroughly to ensure the rack fits seamlessly without overwhelming the room․ Think about the style of your home and choose materials and finishes that complement it․ For small spaces, opt for compact or multi-tiered designs to maximize storage while minimizing footprint․ Open shelving allows easy access, while enclosed compartments provide dust protection․ Consider the number of shoes you need to store and their sizes to avoid overcrowding․ Customization is key—adjust the height, depth, and number of shelves based on your needs․ Adding wheels or casters can enhance mobility, making it easy to reposition the rack․ Finally, integrate decorative elements like trim or paint to match your interior decor․ Proper planning ensures your shoe rack is both functional and visually appealing․
Step-by-Step Building Instructions
Building a shoe rack is a manageable DIY project if you follow a structured approach․ Start by gathering all materials and tools, ensuring everything is within reach․ Begin by cutting the plywood or wood planks according to the measurements outlined in your plan․ Sand the cut pieces to smooth out any rough edges․ Next, assemble the frame by attaching the sides and base using screws or nails․ Ensure the structure is sturdy and level before proceeding․ Once the frame is ready, install the shelves, spacing them evenly to accommodate different shoe sizes․ Secure the shelves with brackets or supports for added stability․ After assembling, sand the entire rack to ensure a smooth finish․ Apply paint, stain, or varnish to match your desired aesthetic․ Allow the finish to dry completely before use․ Finally, place the rack in your chosen location and organize your shoes neatly․ Follow these steps carefully to create a durable and functional shoe storage solution․
Finishing Touches and Customization
Once your shoe rack is assembled, it’s time to add the finishing touches and personalize it to match your style․ Start by sanding all surfaces to ensure a smooth finish․ Apply paint, stain, or varnish to protect the wood and enhance its appearance․ For a modern look, consider adding a clear coat of polyurethane․ Customization options include attaching decorative hardware, such as knobs or handles, or incorporating additional storage features like baskets or drawers․ If you’re aiming for a sleek, contemporary design, you can add LED lighting to illuminate the shelves․ Another creative idea is to add casters for mobility, making it easy to move the rack as needed․ Personalize further by engraving or painting patterns that reflect your home decor․ Finally, place your shoes neatly on the rack, arranging them by size or color for a polished look․ These finishing touches will transform your DIY project into a stylish and functional piece that complements your space․
Tips for Organizing Your Shoes
Organizing your shoes effectively is key to maintaining a clutter-free and stylish space․ Start by assessing your shoe collection and categorizing them by type, such as heels, flats, boots, and seasonal footwear․ Use stackable or multi-tiered shoe racks to maximize vertical space, especially in small areas like entryways or closets․ Consider adding shelves or compartments to store accessories like shoelaces, polish, or insoles․ For a polished look, arrange shoes by size or color to create a visually appealing display․ If you have limited space, opt for wall-mounted racks or over-the-door organizers to keep shoes off the floor․ Regularly clean and maintain your shoes before storing them to prevent dust buildup․ For extra convenience, label each section of the rack to quickly locate your favorite pairs․ Finally, rotate your shoes seasonally to ensure even wear and extend their lifespan․ By implementing these tips, you can keep your shoes organized, accessible, and looking their best․

DIY vs Pre-Made Shoe Racks
When deciding between a DIY shoe rack and a pre-made one, consider your preferences, budget, and skill level․ DIY shoe racks offer customization and cost savings, allowing you to tailor the design to your space and style․ With free shoe rack plans PDFs, you can choose materials and sizes that fit your needs, making it a budget-friendly option․ However, DIY projects require time, effort, and basic woodworking skills; On the other hand, pre-made shoe racks are ready to use and offer convenience, especially for those short on time or unfamiliar with DIY projects․ They come in various designs, from modern to traditional, and are often durable and sturdy․ While pre-made racks may be more expensive, they save time and effort․ Ultimately, the choice depends on whether you value customization and cost savings or convenience and immediate functionality․
Safety Tips and Precautions
When working on your shoe rack project, safety should always be your top priority․ Start by wearing protective gear such as safety glasses and gloves to prevent injuries from sharp tools or flying debris․ Ensure your workspace is clear of clutter and well-ventilated, especially when working with power tools or painting; Always follow the manufacturer’s instructions for tools and materials, and double-check the stability of your workpiece before cutting or drilling․ Avoid wearing loose clothing or jewelry that could get caught in machinery, and keep long hair tied back․ Never reach over sharp blades or tools, and maintain a firm grip on hand tools to prevent accidents․ Additionally, keep children and pets away from the workspace while working․ Regularly inspect your tools for damage and ensure they are in good working condition․ By adhering to these safety tips, you can enjoy a smooth and injury-free DIY experience while building your shoe rack․
Budget and Cost Considerations
When planning your shoe rack project, it’s essential to consider your budget to ensure the project remains cost-effective․ The total cost will depend on the materials and tools you choose․ For a basic shoe rack, you can expect to spend between $50 to $200, depending on the design and materials․ Lumber, such as plywood or pine wood, is typically the most significant expense․ A standard shoe rack might require 2-3 sheets of 3/4-inch plywood, costing around $30-$50 per sheet․ Additionally, screws, hinges, and other hardware will add to the cost․ If you’re using power tools like a circular saw or drill, consider whether you already own them or need to purchase/rent them, as this can increase expenses․ To save money, consider using reclaimed wood or shopping during sales for materials․ DIY projects often offer significant savings compared to buying pre-made shoe racks․ By planning carefully and shopping smartly, you can build a functional and stylish shoe rack without breaking the bank․ This approach ensures your project stays within budget while delivering a high-quality result․
Space-Saving Solutions
Maximizing space is a key consideration when building a shoe rack, especially for smaller homes or apartments․ One effective solution is to opt for a wall-mounted shoe rack, which keeps your shoes organized without occupying floor space․ Vertical storage is another great option, as it utilizes height rather than width․ Multi-tiered shoe racks are also ideal for saving space, allowing you to stack shoes neatly in a compact footprint․ Consider using adjustable shelves to accommodate shoes of different sizes, ensuring efficient use of every inch․ For tight spaces, a sliding shoe rack or a foldable design can be practical․ Additionally, combining your shoe rack with other storage, such as a bench or cabinet, offers a dual-purpose solution․ By choosing the right design, you can keep your shoes organized while maintaining a clutter-free and spacious living area․ These space-saving ideas ensure your shoe rack is both functional and unobtrusive, perfect for modern interiors․
Customization Ideas
Customizing your shoe rack allows you to tailor it to your personal style and needs․ Start by choosing materials that match your home decor, such as wood finishes or metal accents․ Adding a fresh coat of paint or stain can give your shoe rack a unique look․ Consider incorporating decorative hardware, like knobs or handles, for a polished appearance․ For added functionality, you can include shelves, drawers, or compartments to store accessories like laces or polish․ Personalize the design by engraving your name or a pattern, or add casters for mobility․ If you prefer a rustic vibe, distressed finishes or reclaimed wood can create a charming aesthetic․ Lighting, such as LED strips, can also be integrated to highlight your shoe collection․ These customization ideas enable you to create a shoe rack that not only organizes your shoes but also complements your interior design․ Make it truly yours with creative touches that reflect your taste and lifestyle․

Troubleshooting Common Issues
When building a shoe rack, common issues may arise, but they can often be resolved with simple solutions․ One frequent problem is uneven shelves, which can occur due to incorrect measurements or uneven surfaces․ To fix this, ensure all boards are properly aligned and use a level during assembly․ If the rack feels wobbly, check the frame’s stability and reinforce the joints with additional screws or brackets․ Another issue is shelves bowing under weight, which can be addressed by using thicker wood or adding support brackets․ If the finish is peeling, it may be due to improper preparation; sand the surface thoroughly and allow paint or stain to dry completely before use․ For loose joints, tighten the screws or apply wood glue for extra stability․ Finally, if the rack doesn’t fit the space, adjust the dimensions according to your needs․ By addressing these common problems, you can ensure your shoe rack is sturdy, functional, and long-lasting․
Maintenance and Upkeep Tips
Proper maintenance ensures your shoe rack remains durable and functional over time․ Regularly clean the surface with a soft cloth to remove dust and dirt, preventing the buildup of grime․ For wooden racks, apply a wood conditioner or polish periodically to maintain the finish and protect against moisture․ Inspect the structure for any signs of wear, such as loose screws or wobbly shelves, and tighten or replace parts as needed․ If you notice scratches or fading, touch them up with matching paint or stain․ To prevent pests like moths or insects, store shoes in airtight containers or use natural deterrents like cedar blocks․ Organize your shoes regularly to avoid overcrowding, which can strain the rack’s frame․ For racks with moving parts, lubricate hinges or wheels to ensure smooth operation․ Seasonal inspections and minor adjustments will help extend the lifespan of your shoe rack, keeping it looking its best and functioning seamlessly․
Popular DIY Shoe Rack Projects
Discover inspiring DIY shoe rack projects that cater to various styles and spaces․ One popular design is the Industrial Shoe Rack, featuring metal pipes and reclaimed wood for a modern, edgy look․ Another favorite is the Floating Bench with Shoe Shelf, perfect for entryways, combining storage with a convenient seating option․ The Scrap Wood Shoe Cabinet is a budget-friendly choice, ideal for upcycling materials․ For small areas, the DIY Stackable Shoe Rack offers a space-saving solution․ Additionally, the Wall-Mounted Shoe Cubby is a great option for maximizing vertical space․ Many of these projects include detailed plans, step-by-step guides, and customizable options to suit your preferences․ Whether you prefer minimalist designs or rustic finishes, these DIY shoe rack projects provide practical and stylish storage solutions․ They are perfect for organizing your footwear while adding a personal touch to your home decor․ With these plans, you can create a shoe rack that fits your lifestyle and enhances your space․
Additional Resources and Plans
For those looking to expand their DIY shoe rack projects, there are numerous additional resources and plans available online․ Websites offer a variety of free and premium shoe rack plans, catering to different styles and skill levels․ One popular resource is the Scrap Wood Shoe Cabinet, perfect for upcycling materials․ Another is the Industrial Shoe Rack, featuring a modern, rustic design․ You can also find plans for a Floating Bench with Shoe Shelf, ideal for entryways, and a DIY Stackable Shoe Rack for small spaces․ Many platforms provide step-by-step guides, diagrams, and photos to ensure a smooth building process․ Additionally, forums and DIY communities share tips and customization ideas, helping you personalize your shoe rack․ Some plans even include budget estimates and time requirements, making it easier to plan your project․ Whether you’re a beginner or an experienced DIYer, these resources offer inspiration and practical guidance to create functional and stylish shoe storage solutions․ Explore these additional resources to find the perfect plan for your needs and skill level․
Congratulations on reaching the end of this comprehensive guide to Shoe Rack Plans PDF! By now, you’ve gained valuable insights into designing, building, and organizing your shoe storage․ Whether you’re a DIY novice or an experienced craftsman, these plans offer a practical solution to shoe clutter․ With step-by-step instructions, material lists, and customization ideas, you’re equipped to create a shoe rack that fits your space and style․ Remember to explore additional resources for inspiration and tips to enhance your project․ Building a shoe rack is not only a functional endeavor but also a creative outlet․ Take pride in your handmade storage solution and enjoy the satisfaction of a well-organized home․ Don’t hesitate to experiment with designs or materials to make your shoe rack truly unique․ Happy building, and enjoy your newly organized shoe collection!
FAQs About Shoe Rack Plans PDF
Frequently Asked Questions (FAQs) about Shoe Rack Plans PDF address common queries to help you get started․ Here are the answers to some of the most asked questions:
- What is included in a Shoe Rack Plans PDF? These plans typically include step-by-step instructions, material lists, diagrams, and finishing tips to guide you through the building process․
- Do I need advanced woodworking skills? No, most plans are designed for beginners, with clear instructions and simple tools required․
- Can I customize the designs? Absolutely! Plans often allow for customization to fit your space, style, or shoe collection needs․
- What materials are required? Common materials include plywood, screws, and wood finishes․ Specific lists are provided in the plans․
- How long does it take to build a shoe rack? Most projects can be completed in a day or a weekend, depending on the design complexity․
- Are the plans suitable for small spaces? Yes, many designs are space-saving and adaptable to fit compact areas․
These answers should help you feel confident in starting your DIY shoe rack project․ Happy building!