The Honeywell TH5220D1003 is a non-programmable digital thermostat from the FocusPRO series, designed for single-stage heating and cooling systems. It offers easy operation, precise temperature control, and compatibility with various HVAC systems, making it a reliable choice for homeowners seeking efficient climate management.
Safety Guidelines for Installation
Safety is crucial when installing the Honeywell TH5220D1003 thermostat. Always disconnect the power supply before making any wiring connections to avoid electrical shock or damage. Ensure all wiring is done strictly according to the provided diagrams and guidelines. Proper overload protection and disconnect means must be in place. Never attempt installation without following safety precautions, and only qualified personnel should perform the wiring. Incorrect installation can lead to system malfunctions or safety hazards.

Pre-Installation Checklist
Before installing the Honeywell TH5220D1003, ensure you have the correct tools and materials. Verify system compatibility with the thermostat’s specifications. Check existing wiring for damage or wear. Ensure power is disconnected at the circuit breaker. Gather necessary components like wall anchors and screws. Review the wiring diagram for your specific HVAC configuration. Familiarize yourself with the installation manual to avoid errors. Ensure all safety precautions are understood and followed strictly to prevent electrical hazards.
Wiring Diagrams and Requirements
Consult the wiring diagrams specific to your HVAC system type. Ensure power is disconnected before wiring. Follow safety guidelines to prevent electrical shock or damage.
4.1. Wiring Diagram for 1H/1C Systems
The wiring diagram for 1H/1C systems involves connecting the thermostat to a single heating and single cooling system. Connect the R (24V AC) wire to the thermostat’s R terminal. The W wire links to the heating stage, while the Y wire connects to the cooling stage. The G wire controls the fan, and the C wire provides common voltage. Ensure proper connections to avoid system malfunctions. Refer to the manual for specific configurations and safety guidelines to prevent electrical hazards.
4.2. Wiring Diagram for 2H/1C Systems
For 2H/1C systems, the Honeywell TH5220D1003 thermostat requires specific wiring to control two heating stages and one cooling stage. Connect the R wire to the R terminal and the W wire to the first heating stage. The W2 wire connects to the second heating stage. The Y wire links to the cooling stage, and the G wire controls the fan. A field jumper must be installed between the W and W2 terminals to enable dual heating stages. Ensure proper connections to avoid system issues and follow safety guidelines to prevent electrical hazards.
4.3. Wiring Diagram for Heat Pump Systems
For heat pump systems, the Honeywell TH5220D1003 thermostat requires specific wiring to manage heating and cooling efficiently. Connect the R wire to the R terminal, W to the heating stage, and Y to the cooling stage. The G wire controls the fan, and the L terminal must be connected for continuous power. A field jumper between W and Y terminals is necessary for heat pump operation. Ensure the system type is set to 2Heat/1Cool Heat Pump in Installer Setup. Always disconnect power before wiring to avoid electrical hazards and follow manufacturer guidelines for proper installation.
4.4. Wiring Diagram for Zoning Systems
For zoning systems, the Honeywell TH5220D1003 thermostat requires specific wiring to integrate with zone panels. Connect the R wire to the R terminal and the W and Y wires to their respective heating and cooling terminals. The G wire controls the fan, and the L terminal provides continuous power. Zone panels must be connected to the Z, F, and C terminals as per the zoning system’s requirements. Ensure the zoning system setup is enabled in Installer Settings and follow safety guidelines by disconnecting power before wiring.

Step-by-Step Installation Instructions
- Mount the thermostat on a flat wall, ensuring proper leveling and spacing from heating/cooling sources.
- Connect the wires to the appropriate terminals, following the wiring diagram for your system type.
- Configure the thermostat settings to match your HVAC system and preferred operation modes.
- Test the thermostat by running a full heating and cooling cycle to ensure proper operation.
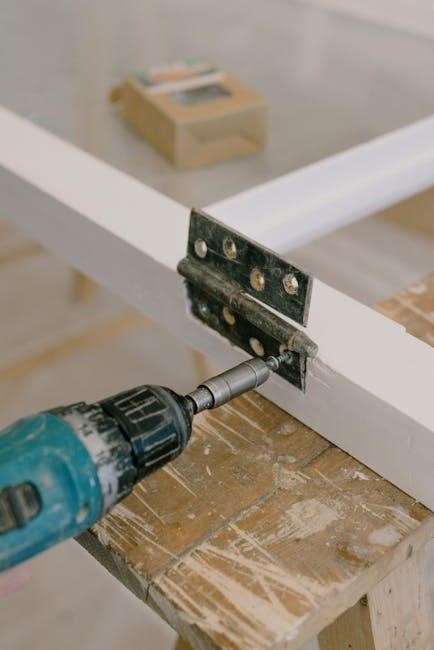
5.1. Mounting the Thermostat
To mount the Honeywell TH5220D1003 thermostat, ensure the wall surface is flat and clean. Remove the wallplate from the thermostat by taking out the battery holder. Separate the wallplate and thermostat. Use the provided mounting screws to secure the wallplate to the wall, ensuring it is level. Avoid forcing the wallplate to prevent damage. Once installed, reattach the thermostat to the wallplate. Disconnect power to the HVAC system before starting installation to ensure safety. Proper leveling is crucial for accurate temperature sensing and operation.
5.2. Connecting Wires to the Thermostat
Connect the wires to the thermostat by matching them to the correct terminals based on your system type. Ensure the power supply is disconnected before starting. For a 1H/1C system, connect the heating and cooling wires to the appropriate terminals (e.g., R, W, Y, and C). For heat pumps or zoning systems, additional wires may be required. Refer to the wiring diagram in the manual for specific configurations. Secure all connections firmly to prevent loose wires. Double-check connections before restoring power to the system.
5.3. Configuring the Thermostat Settings
After wiring, configure the thermostat settings to match your HVAC system. Select the system type (e.g., heat pump, 1H/1C, or 2H/1C) in the installer menu. Set the heating and cooling stages, fan operation, and temperature range. Adjust the temperature differential to optimize performance. Ensure the date and time are correct for scheduling. Refer to the wiring diagram for specific configuration options. Test the system to confirm all settings are functioning properly. Proper configuration ensures efficient and accurate temperature control.
5.4. Testing the Thermostat Operation
After installation and configuration, test the thermostat operation to ensure proper functionality. Turn on the power supply and verify the display lights up. Test heating and cooling modes by adjusting the temperature setpoints. Check if the system responds correctly to temperature changes. Ensure the fan operates in the selected mode and transitions smoothly between heating and cooling. Verify that all configured settings, such as temperature differential and stage operation, function as expected. If any issues arise, consult the manual for troubleshooting steps. Once verified, the system is ready for normal operation and programming.

System Configuration and Settings
Configure the system to optimize heating and cooling performance by setting heating/cooling stages, operation modes, and temperature adjustments to meet specific comfort preferences.
6.1. Setting Up Heating and Cooling Stages
Configure the thermostat to manage single or multi-stage HVAC systems. For single-stage systems, select the appropriate heating and cooling stages. For multi-stage systems, enable stage 1 and stage 2 heating and cooling options. Ensure the system type matches your HVAC equipment. Access the installer settings menu to adjust these configurations. Proper setup ensures efficient operation, optimizing performance and energy use. Refer to the installation manual for detailed instructions on stage configuration.
6.2. Configuring Thermostat Operation Modes
Select the appropriate operation mode for your HVAC system. Choose from options like Heat Only, Cool Only, or Auto mode, which automatically switches between heating and cooling. For heat pumps, enable the specific heat pump mode. Access the installer settings menu to configure these options. Ensure the system type matches your equipment for proper operation. Correct mode configuration ensures optimal performance and energy efficiency. Refer to the manual for detailed steps on setting up operation modes tailored to your HVAC setup.
6.3. Adjusting Temperature Setpoints
Adjust temperature setpoints to customize comfort levels. Use the up/down arrows to set desired temperatures for heating and cooling modes. Temporary holds can override schedules temporarily. For permanent adjustments, access the thermostat menu to set specific temperatures for home, away, or sleep modes. Ensure the system type matches your HVAC setup. Consult the manual for detailed instructions on configuring setpoints to optimize efficiency and comfort without altering installer settings unnecessarily.
Thermostat Programming and Scheduling
Program the thermostat to create a weekly schedule, set temperature holds, and enable energy-saving features. Use the interface to customize settings for optimal comfort and efficiency easily.
7.1. Creating a Weekly Schedule
To create a weekly schedule, access the menu and select the day(s) you want to program. Set the desired time and temperature for each period. Repeat for all days, ensuring consistency or adjusting as needed. Save your settings to apply the schedule. The thermostat will automatically adjust temperatures based on your programmed preferences, optimizing comfort and energy use throughout the week. Review and modify the schedule as needed to match your lifestyle or seasonal changes.
7.2. Setting Temperature Hold Parameters
To set temperature hold parameters, navigate to the thermostat’s menu and select the “Hold” option. Choose between temporary or permanent holds. Temporary holds maintain the set temperature for a specific duration, while permanent holds keep it until manually changed. Adjust the temperature using the up/down arrows and confirm your selection. This feature allows you to override the schedule without altering the programmed settings, providing flexibility while maintaining energy efficiency. Ensure the hold feature is disabled when returning to the standard schedule.
7.3. Enabling Energy-Saving Features
To enable energy-saving features on the Honeywell TH5220D1003, access the thermostat’s menu and navigate to the energy-saving options. Select “Smart Recovery” to allow the thermostat to begin cooling or heating early, ensuring the set temperature is reached by the scheduled time. Enable “Adaptive Learning” to let the thermostat adjust based on your system’s performance and temperature changes. These features optimize energy usage while maintaining comfort. Refer to the manual for additional settings to maximize efficiency.
Advanced Features and Customization
The Honeywell TH5220D1003 offers advanced features like Smart Recovery, which learns your system’s behavior to optimize heating and cooling. It also supports remote access via the Honeywell Home app and integrates with smart home systems for enhanced convenience. Additionally, energy usage monitoring provides insights to help reduce consumption, balancing efficiency and comfort seamlessly.
8.1; Smart Recovery and Adaptive Learning
The Honeywell TH5220D1003 features Smart Recovery, which learns your HVAC system’s behavior to preheat or cool your home, ensuring the set temperature is reached exactly when needed. Adaptive Learning technology continuously adjusts to your schedule and preferences, optimizing energy use. This intelligent system reduces temperature fluctuations and improves comfort while minimizing energy waste, making it an efficient and convenient feature for modern homes. It operates seamlessly, requiring minimal user intervention once activated.
8.2. Remote Access and Smart Home Integration
The Honeywell TH5220D1003 thermostat supports remote access through Honeywell’s Total Connect Comfort app, allowing users to monitor and control temperatures from anywhere. It integrates seamlessly with popular smart home systems like Amazon Alexa and Google Assistant, enabling voice commands and enhanced automation. Geofencing and voice control features further enhance convenience, making it easy to adjust settings based on your location or preferences, ensuring optimal comfort and energy efficiency without manual adjustments.
8.3. Energy Usage Monitoring
The Honeywell TH5220D1003 thermostat provides detailed energy usage monitoring, allowing homeowners to track their heating and cooling consumption. Through Honeywell’s Total Connect Comfort app, users can view energy reports and identify trends to optimize efficiency. The thermostat also supports geofencing and smart alerts, notifying users of high energy usage patterns. These features empower users to make informed decisions, reducing energy waste and lowering utility bills while maintaining comfort. This functionality aligns with smart home integration, enhancing overall energy management capabilities.
Troubleshooting Common Issues
This section addresses common problems like the thermostat not turning on, incorrect temperature readings, or the system not responding. Solutions are provided to resolve these issues effectively.
9.1. Thermostat Not Turning On
If the Honeywell TH5220D1003 thermostat fails to turn on, ensure the power supply is connected. Check circuit breakers or fuses. Verify wiring connections are secure and correct, referring to the wiring diagram. Ensure the thermostat is properly mounted and batteries (if applicable) are installed correctly. If issues persist, consult the installation manual or contact Honeywell customer support for further assistance. Always disconnect power before troubleshooting electrical connections to avoid safety hazards.
9.2. Incorrect Temperature Readings
If the Honeywell TH5220D1003 thermostat displays incorrect temperatures, check the calibration settings. Ensure the thermostat is level and free from obstructions. Verify the sensor is clean and not exposed to direct sunlight or drafts. If issues persist, refer to the installation manual for recalibration instructions or reset the thermostat. Ensure proper wiring connections, as loose wires can cause inaccurate readings; Consult the wiring diagram to confirm connections are correct. If problems remain, contact Honeywell support for further assistance.
9.3. System Not Responding to Thermostat
If the HVAC system fails to respond to the Honeywell TH5220D1003 thermostat, ensure the thermostat is properly powered. Check circuit breakers or fuses for tripped or blown conditions. Verify all wiring connections between the thermostat and HVAC system, referring to the wiring diagram in the manual. Ensure the system switch is set to the correct position (Heat, Cool, or Auto). If issues persist, disconnect power and reset the thermostat by removing batteries for 30 seconds. If problems continue, consult Honeywell customer support or a licensed technician.
Maintenance and Upkeep
Regularly clean the thermostat to ensure accurate temperature readings. Check and replace batteries as needed. Update software if applicable. Refer to the manual for detailed instructions.
10.1. Cleaning the Thermostat
Regular cleaning ensures optimal performance. Turn off power to the thermostat before cleaning. Gently wipe the display and exterior with a soft, dry cloth. Avoid harsh chemicals or liquids, as they may damage the device; For stubborn dirt, lightly dampen the cloth, but ensure no moisture enters the unit. Clean the sensors and contacts to maintain accurate temperature readings and reliable operation. Regular maintenance helps extend the thermostat’s lifespan and ensures precise temperature control.
10.2. Replacing Batteries
To replace the batteries, first, ensure the thermostat is powered off. Locate the battery compartment, typically on the front or rear. Gently remove the cover and take out the old batteries. Insert new alkaline batteries, ensuring correct polarity. Replace the cover securely. Avoid mixing old and new batteries or using rechargeable types. Check the expiration date of new batteries for optimal performance. Proper battery replacement ensures consistent operation and prevents system malfunctions. Regular checks help maintain reliable thermostat functionality year-round.
10.3. Updating Software (if applicable)
Software updates for the Honeywell TH5220D1003 thermostat are typically not required, as it is a non-programmable device. However, if updates are available, ensure the thermostat is compatible with the latest software. Download updates from Honeywell’s official website or through a designated app. Follow the manufacturer’s instructions carefully to avoid system malfunctions. Use a USB connection or other specified methods to apply updates. Never interrupt the update process. If issues arise, consult the user manual or contact Honeywell support for assistance.
Manufacturer Support and Resources
Honeywell offers comprehensive support, including customer service contact, online manuals, and warranty details. Visit their official website for resources and assistance with the TH5220D1003 thermostat.
11.1. Contacting Honeywell Customer Service
To contact Honeywell’s customer service for assistance with your TH5220D1003 thermostat, you can reach out through their official website, by phone, or via email. It’s advisable to have your product model number, installation details, and a clear description of the issue ready to facilitate a smooth support process. Additionally, checking their online resources or FAQ section might provide immediate solutions, allowing you to resolve the problem independently.
11.2. Accessing Online Manuals and Guides
To access the Honeywell TH5220D1003 installation manual and guides, visit the official Honeywell website or authorized platforms like ManualsLib or Manualzz. These resources provide detailed instructions for installation, wiring, and configuration, ensuring a smooth setup process.
The manual is available in PDF format, covering topics such as wiring diagrams, system compatibility, and troubleshooting. Additional guides offer step-by-step instructions for programming and maintaining your thermostat, ensuring optimal performance and energy efficiency.
11.3. Warranty Information
The Honeywell TH5220D1003 thermostat is backed by a limited warranty covering manufacturing defects. Typically, the warranty period is one year from the date of purchase, though specific terms may vary. For detailed warranty conditions, including coverage and exclusions, refer to the official Honeywell website or the product’s documentation. Registration may be required to activate warranty benefits. Always ensure proper installation and maintenance to avoid voiding the warranty.