Olympus OM-1 Instruction Manual: A Comprehensive Guide
Delve into the world of classic photography with this detailed guide‚ offering insights into the Olympus OM-1’s operation‚ features‚ and historical context‚
along with service manuals and user guides available for download.
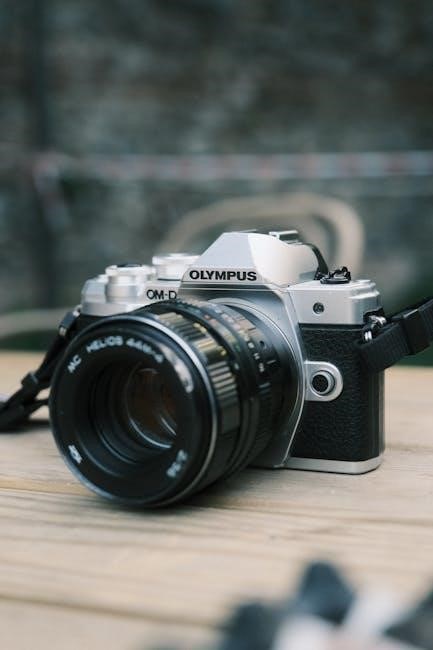
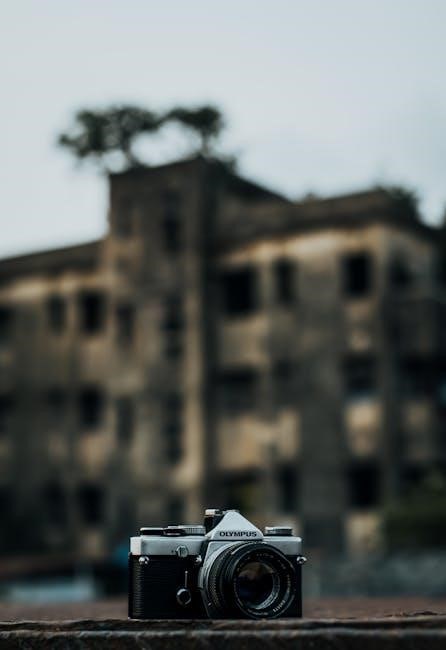
The Olympus OM-1‚ launched in 1972‚ represents a pivotal moment in SLR camera history‚ pioneering a shift towards compact‚ yet fully-featured‚ designs. This camera quickly gained recognition as a masterpiece of engineering‚ celebrated for its intuitive interface and exceptional build quality. This manual serves as a comprehensive resource for both novice and experienced photographers seeking to understand and utilize the OM-1’s capabilities.
Often lauded for possessing the best viewfinder of its era‚ the OM-1 offers a bright and clear viewing experience. Whether you’re exploring vintage photography or seeking a reliable manual camera‚ this guide will illuminate the features and functions that make the OM-1 a timeless classic. Discover downloadable service manuals and user guides to enhance your understanding and maintenance of this iconic camera.
Historical Significance and Design Philosophy
The Olympus OM-1 dramatically altered the SLR landscape upon its 1972 introduction‚ initiating a trend towards smaller‚ yet remarkably capable cameras. Prior to the OM-1‚ SLRs were often bulky and heavy; Olympus challenged this convention with a design prioritizing compactness and user-friendliness without sacrificing functionality. This innovative approach resonated with photographers seeking a more portable and accessible system.
The design philosophy centered on creating a harmonious balance between form and function. The OM-1’s sleek aesthetic wasn’t merely cosmetic; it reflected a commitment to ergonomic design and intuitive controls. This camera wasn’t just a tool‚ but an extension of the photographer’s vision‚ embodying a dedication to quality and precision that continues to be appreciated today‚ making it a truly significant piece of photographic history.
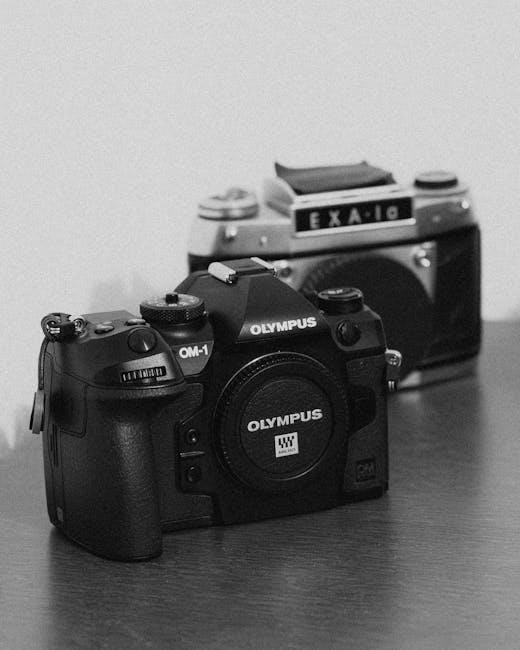
Key Features and Specifications
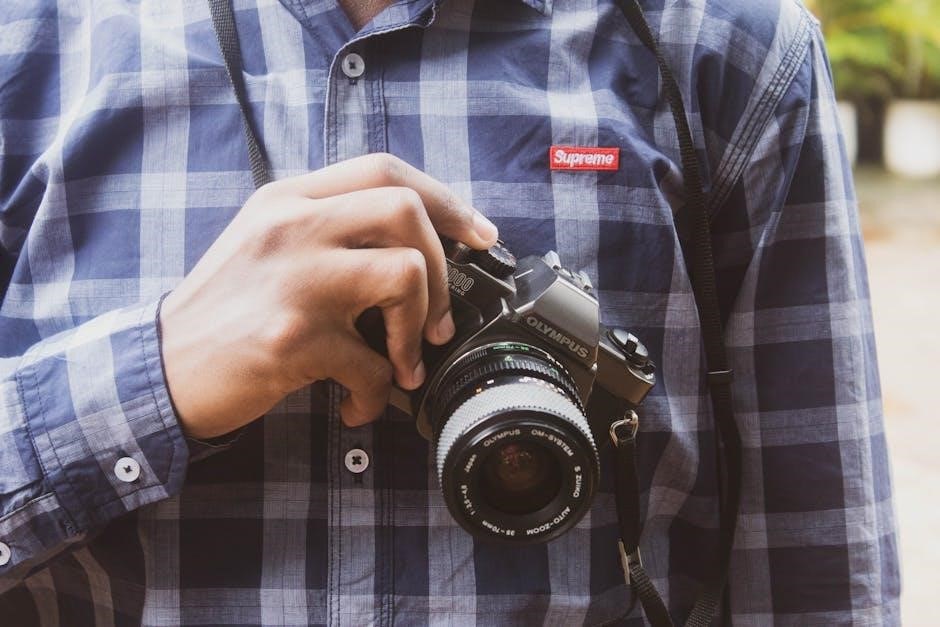
The Olympus OM-1 stands out as a fully mechanical‚ single-lens reflex (SLR) camera‚ renowned for its reliability and precision. It features a focal plane shutter with speeds ranging from 1 to 1000 of a second‚ plus Bulb mode‚ offering versatile control over exposure. The camera accepts the Olympus OM-system lenses‚ celebrated for their optical quality and compact size.
Its exceptional viewfinder‚ often lauded as one of the best ever created‚ provides a bright and clear view of the scene. The integrated light meter utilizes a center-weighted averaging pattern‚ aiding in accurate exposure determination. The OM-1’s robust build quality and intuitive controls contribute to its enduring appeal‚ making it a favorite among both amateur and professional photographers seeking a classic‚ dependable camera system.
Understanding the Camera Body
Explore the physical layout of the OM-1‚ dissecting each panel – front‚ top‚ back‚ and bottom – to identify controls‚ indicators‚ and access points for optimal use.
Front Panel Overview: Controls and Indicators
The Olympus OM-1’s front panel is elegantly minimalist‚ prioritizing functionality within a compact design. Centrally positioned is the lens mount‚ accepting the versatile Olympus OM system lenses. Surrounding the mount‚ you’ll find the aperture control ring‚ directly linked to the lens itself‚ allowing precise adjustments to depth of field.
Notably absent are numerous dials or buttons‚ reflecting the OM-1’s philosophy of intuitive operation. The self-timer release is discreetly located‚ initiating a delayed shutter release for self-portraits or group shots. A small button activates the depth-of-field preview‚ enabling visualization of the final image’s sharpness.
Crucially‚ the front panel lacks direct exposure controls; these are primarily managed via the top panel and the internal metering system. The overall design emphasizes a clean aesthetic‚ focusing on essential elements for a streamlined photographic experience.
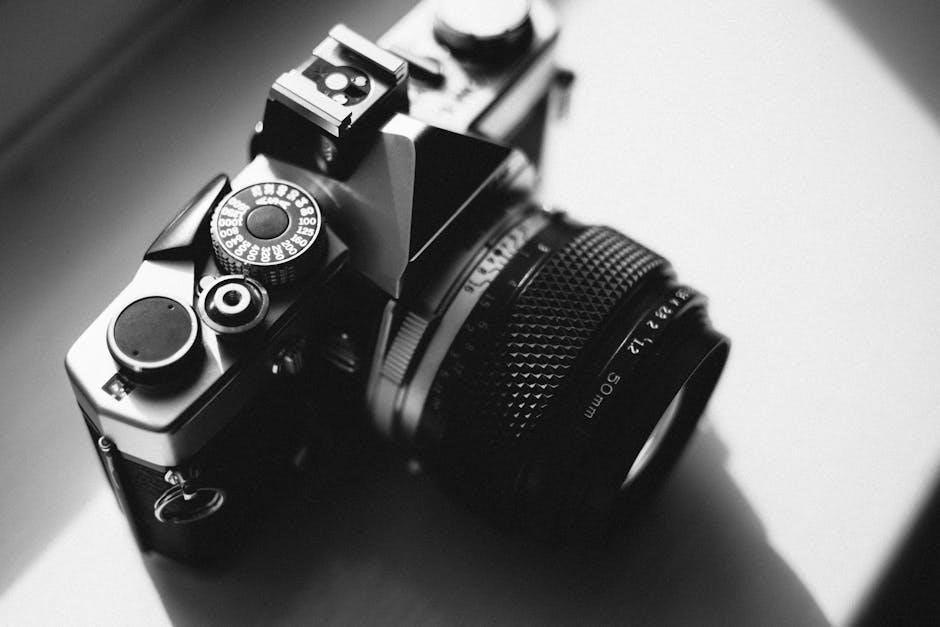
Top Panel Overview: Shutter Speed‚ Exposure Compensation
The Olympus OM-1’s top panel houses the critical controls for exposure settings. A prominent shutter speed dial allows selection from a wide range‚ typically spanning from 1 second to 1/1000th of a second‚ plus Bulb mode for long exposures. This dial directly dictates the duration the shutter remains open‚ influencing motion blur and overall brightness.
Adjacent to the shutter speed dial is the exposure compensation dial‚ a vital tool for overriding the camera’s internal metering. This allows photographers to fine-tune exposure in challenging lighting conditions‚ preventing under or overexposure.
Furthermore‚ the film advance lever is located on the top panel‚ smoothly advancing the film and cocking the shutter. A frame counter displays the number of exposures taken‚ aiding in film management. The overall layout prioritizes quick and intuitive access to essential shooting parameters.
Back Panel Overview: Film Advance‚ Rewind‚ Viewfinder
The rear of the Olympus OM-1 is dominated by the large‚ bright viewfinder‚ renowned for its clarity and comprehensive information display. Surrounding the viewfinder are controls essential for film handling. The film advance lever‚ previously mentioned‚ completes its cycle here‚ preparing for the next shot.
To the side‚ the film rewind crank facilitates the safe and controlled rewinding of exposed film back into its cassette. A rewind release button must be engaged before rewinding can commence. The back panel also features a hinged door providing access to the film chamber for loading and unloading film.
Notably‚ the OM-1’s viewfinder offers a split-image rangefinder and microprism collar‚ assisting in precise manual focusing – a hallmark of this classic camera.
Bottom Panel Overview: Battery Compartment‚ Tripod Socket
The underside of the Olympus OM-1 houses two crucial components for operation and stability. Firstly‚ the battery compartment‚ designed to accommodate PX28 or equivalent 4LR44/4SR44 batteries‚ powers the camera’s light meter. Access is typically via a sliding cover‚ requiring a coin or similar tool for opening.
Secondly‚ a standard tripod socket is centrally located‚ allowing for secure mounting of the camera onto a tripod for enhanced stability during long exposures or when using telephoto lenses. This socket ensures a balanced and secure connection.
Care should be taken when accessing the battery compartment to avoid damage‚ and always ensure the compartment is securely closed to maintain proper electrical contact and prevent battery leakage.
Operating the Olympus OM-1
Mastering the OM-1 involves understanding film loading‚ shutter speed adjustments‚ aperture control‚ and the intricacies of its metering system for optimal exposure.
Loading and Unloading Film
Begin by opening the film back lever‚ located on the camera’s left side‚ and inserting the 35mm film cassette into the film chamber. Ensure the film leader extends across the camera body to the take-up spool. Gently advance the film using the film advance lever‚ checking that the rewind knob rotates‚ confirming proper engagement.
Close the film back securely and continue advancing the film‚ stopping after a couple of strokes to align the film leader with the take-up spool’s slot. Continue advancing and shooting until you reach the film’s end.
To unload‚ press the film rewind button on the bottom plate and turn the rewind knob in the direction of the arrow until the film is fully retracted into the cassette. Open the film back and remove the film cassette. Proper loading and unloading are crucial for preserving your images and the camera’s functionality.
Setting the Shutter Speed
The Olympus OM-1 features a horizontally-oriented shutter speed dial located on the top panel. This dial allows precise control over exposure time‚ ranging from 1 second to 1/1000th of a second‚ plus Bulb (B) for long exposures. To adjust the shutter speed‚ rotate the dial until the desired setting aligns with the indicator mark.
Understanding the relationship between shutter speed and motion is key. Faster shutter speeds freeze action‚ while slower speeds allow for motion blur. The ‘B’ setting keeps the shutter open as long as the shutter release button is pressed‚ ideal for low-light photography or creative effects.
Remember to consider the aperture setting in conjunction with shutter speed to achieve proper exposure. Incorrect shutter speed selection can result in blurry images or underexposure/overexposure.
Aperture Control and Depth of Field
Aperture‚ controlled by the lens’s aperture ring‚ dictates the size of the lens opening and significantly impacts both exposure and depth of field. The OM-1’s lenses utilize a standardized f-stop scale (e.g.‚ f/2.8‚ f/4‚ f/5.6). Smaller f-numbers (larger apertures) allow more light and create a shallow depth of field‚ blurring the background. Larger f-numbers (smaller apertures) reduce light intake and increase depth of field‚ keeping more of the scene in focus.
Depth of field is the range of distance within a photograph that appears acceptably sharp. Adjusting the aperture is the primary method for controlling depth of field. For portraits‚ a shallow depth of field isolates the subject. For landscapes‚ a large depth of field ensures everything is sharp.
Experiment with different aperture settings to understand their effect on your images and master creative control.
Metering System: Understanding the Light Meter
The Olympus OM-1 features a center-weighted metering system‚ meaning it prioritizes the light reading from the center of the viewfinder. A needle within the viewfinder indicates exposure accuracy: centered means correct exposure‚ while deviations suggest over or underexposure. The meter responds to light reflected from the scene‚ aiming for a middle gray tone.
To activate the meter‚ half-press the shutter button. The needle will move‚ indicating the suggested aperture and shutter speed combination. Remember‚ the meter is a guide; artistic intent may require deviating from its recommendations. Understanding how different subjects (e.g.‚ snow‚ dark clothing) affect the meter is crucial.
Exposure compensation (discussed elsewhere) allows you to override the meter’s reading for specific situations.
Exposure Compensation Techniques
The Olympus OM-1’s exposure compensation dial‚ located on the top panel‚ allows you to fine-tune the meter’s reading. This is essential when photographing scenes with unusual brightness or contrast‚ where the camera might be fooled into underexposing or overexposing. For example‚ a snowy landscape will appear much brighter than middle gray‚ prompting the meter to underexpose.
To compensate‚ dial in a positive (+) value – typically +1 or +2 stops – to brighten the image. Conversely‚ for dark subjects like penguins‚ use a negative (-) value to prevent overexposure. The scale is marked in stops‚ each representing a doubling or halving of light.
Practice is key to mastering exposure compensation; observe the results and adjust accordingly.
Focusing and Viewfinder Usage
Achieve sharp images utilizing the OM-1’s manual focusing system‚ aided by a bright viewfinder and split-image rangefinder for precise subject alignment and clarity.
Focusing Methods: Manual Focusing
The Olympus OM-1 relies entirely on manual focusing‚ demanding a direct connection between the photographer and the image-making process. Rotate the focusing ring on the lens barrel until the subject appears sharpest within the viewfinder. This requires practice and a keen eye‚ but offers complete control.
When focusing‚ observe the split-image rangefinder in the center of the viewfinder. Align the two opposing images into a single‚ cohesive view – this indicates accurate focus. For distant subjects‚ small adjustments to the focusing ring yield significant changes‚ while closer subjects require more delicate movements.
Adapted lenses or challenging circumstances sometimes necessitate manual focusing. Thankfully‚ the OM-1 boasts impressive focusing aids to assist you. Mastering manual focus unlocks a deeper understanding of photographic principles and allows for creative control beyond automated systems.
Viewfinder Information: What You See
The Olympus OM-1’s viewfinder is renowned for its brightness and clarity‚ providing a comprehensive view of the scene. Within the viewfinder‚ you’ll find crucial information for accurate exposure and focusing. The central portion displays the split-image rangefinder‚ essential for manual focusing – aligning the split images confirms sharpness.
Around the central focusing aid‚ you’ll observe the exposure meter indicators. These LEDs illuminate to indicate under‚ over‚ or correct exposure based on the camera’s light reading. A “+” sign suggests overexposure‚ a “-” underexposure‚ and a circle indicates correct exposure.
Additionally‚ the viewfinder displays shutter speed information‚ allowing you to quickly assess your settings. This combination of focusing and exposure data within a bright‚ clear view makes the OM-1 a joy to use.
Focusing Aids and Split-Image Rangefinder
The Olympus OM-1 excels in manual focusing‚ largely due to its sophisticated focusing aids. The primary aid is the split-image rangefinder located in the center of the viewfinder. This ingenious system presents a slightly offset image; when the two halves align perfectly‚ your subject is in sharp focus.
For subjects lacking sufficient contrast‚ a matte field surrounding the split-image assists in achieving focus. Adapting to this system takes practice‚ but it becomes incredibly intuitive. When using adapted lenses or in challenging lighting‚ these aids become invaluable.
Mastering the split-image rangefinder allows for precise focusing‚ crucial for capturing detailed and impactful images with the OM-1. It’s a testament to the camera’s thoughtful design.
Advanced Features and Functions
Explore the OM-1’s capabilities beyond the basics‚ including self-timer operation‚ depth of field preview‚ and creative multiple exposure techniques for unique results.
Self-Timer Operation
The Olympus OM-1’s self-timer is a remarkably simple yet effective feature‚ allowing for delayed shutter release – perfect for portraits where you wish to be included in the frame‚ or for situations demanding minimal camera shake. To activate‚ locate the self-timer lever‚ typically situated on the left side of the camera body near the shutter button.

First‚ set the desired delay – usually a choice between 2 and 10 seconds – by moving the lever accordingly. Once set‚ press the shutter button fully; the lever will spring forward‚ initiating the countdown. A small red lamp near the viewfinder will illuminate during the delay‚ visually confirming the timer’s operation.
Avoid touching the camera during the countdown to prevent unwanted movement. The shutter will release automatically at the end of the selected delay. Remember to return the self-timer lever to its original position after use‚ as forgetting to do so will prevent the shutter from firing normally.
Depth of Field Preview
The Olympus OM-1 incorporates a depth of field preview lever‚ a crucial tool for visually assessing the extent of focus before taking a picture. Located near the aperture control on the lens‚ this lever allows you to temporarily stop down the lens to the selected aperture‚ simulating the actual depth of field that will be captured in the final image.
Engaging the lever darkens the viewfinder image‚ but simultaneously reveals which areas of the scene will appear sharp when the photo is taken. This is particularly useful when working with landscapes or portraits where precise focus control is paramount. Observe the viewfinder carefully to ensure critical elements are within the acceptable focus range.
Remember to release the lever before pressing the shutter button‚ as the camera will shoot at the widest aperture setting unless the lever is disengaged. Mastering depth of field preview enhances your creative control and minimizes focusing errors.
Multiple Exposure Techniques
The Olympus OM-1 enables creative multiple exposures‚ allowing you to superimpose several images onto a single frame. To achieve this‚ utilize the multiple exposure control‚ typically found on the film advance lever. After taking your first exposure‚ instead of advancing the film‚ engage the multiple exposure function.
This prevents the film from advancing‚ preparing the camera for the next exposure on the same frame. Carefully compose and take your subsequent shots‚ building up layers of imagery. Remember to disengage the multiple exposure control after your final exposure and advance the film normally.
Experiment with different combinations and techniques to create surreal or artistic effects. Consider using neutral density filters to balance the exposure across multiple frames. Practice is key to mastering this technique and unlocking the OM-1’s full creative potential.
Maintenance and Troubleshooting
Ensure longevity by regularly cleaning your OM-1 and addressing common issues like light leaks or sticky shutters; battery replacement details are also crucial.
Cleaning and Care of the OM-1
Preserving your Olympus OM-1 requires gentle yet consistent care. Begin by using a soft‚ dry cloth to wipe down the camera body‚ removing dust and fingerprints. For the lens‚ employ a lens brush to eliminate loose particles before using lens cleaning tissue and fluid specifically designed for photographic optics. Avoid harsh chemicals or abrasive cleaners‚ as these can damage the delicate coatings.
The viewfinder should be carefully cleaned with a blower brush to dislodge any dust. Inspect the film chamber regularly for debris‚ and use a soft brush to remove any remnants. Pay attention to the battery compartment‚ ensuring it remains free from corrosion. Proper storage in a dry‚ cool place‚ away from direct sunlight‚ will further protect your OM-1‚ ensuring years of reliable service and maintaining its pristine condition. Regular‚ mindful cleaning is key to a long-lasting photographic companion.
Common Issues and Solutions
Encountering occasional issues with your OM-1 is normal for a vintage camera. A common problem is a stiff shutter release‚ often resolved with a few drops of light machine oil applied carefully. If the film advance is difficult‚ check for obstructions in the film path and ensure proper film loading. A dim viewfinder might indicate a dirty focusing screen‚ requiring professional cleaning.
Light leaks can occur due to deteriorated light seals; replacement is recommended. If the meter isn’t functioning‚ verify the battery and check the contacts. Sticky aperture blades can be gently worked by repeatedly changing the aperture setting. Remember to consult service manuals for detailed troubleshooting steps. If you’re uncomfortable performing repairs‚ seeking a qualified camera technician is always the best course of action to avoid further damage.
Battery Information and Replacement
The Olympus OM-1 utilizes a PX28 or equivalent 4LR44/4SR44 battery to power its light meter. While the camera can function mechanically without a battery‚ metering capabilities are lost. Battery life varies depending on usage‚ but regular use will deplete it over time. When the battery is low‚ the meter needle may become sluggish or inaccurate.
To replace the battery‚ open the battery compartment on the bottom of the camera. Ensure correct polarity when inserting the new battery – positive side up. Avoid mixing old and new batteries. Consider using an alkaline battery for longer life‚ but be aware of potential leakage. Regularly check the battery compartment for corrosion and clean if necessary. Proper battery maintenance ensures accurate exposure readings and extends the life of your OM-1.

Lenses and Accessories
Explore the vast Olympus OM system of compatible lenses and discover useful adapters‚ enhancing your photographic experience with accessories designed for optimal performance.
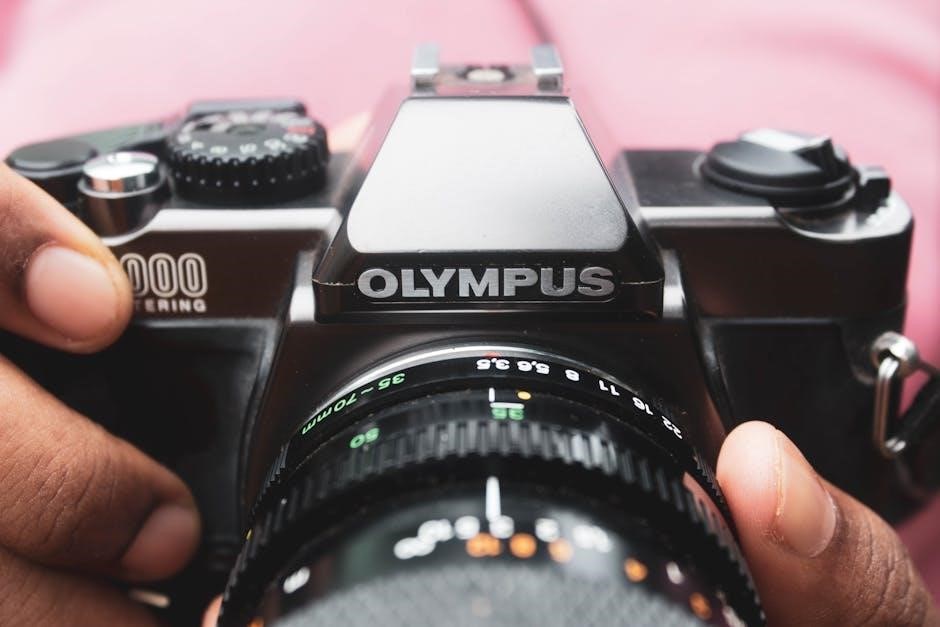
Compatible Lenses: Olympus OM System
The Olympus OM-1 utilizes the renowned Olympus OM system‚ celebrated for its compact size and exceptional optical quality. This system boasts a diverse range of lenses‚ from wide-angle to telephoto‚ catering to various photographic needs. Originally‚ Olympus produced a comprehensive selection of prime and zoom lenses specifically designed for the OM mount.
These lenses are known for their sharpness‚ contrast‚ and overall build quality. Popular choices include the 50mm f/1.8‚ a versatile standard lens‚ and the 28mm f/2.8‚ ideal for street photography and landscapes. The system also features specialized lenses like macro and portrait options. Beyond the original Olympus offerings‚ third-party manufacturers like Sigma and Tamron also created lenses compatible with the OM mount‚ expanding the available choices for photographers.
When selecting lenses‚ consider factors like focal length‚ maximum aperture‚ and intended use to achieve optimal results with your OM-1.
Using Adapters with the OM-1
The Olympus OM-1‚ with its adaptable design‚ allows for the use of lenses from other camera systems via adapters. This opens up a world of creative possibilities‚ enabling photographers to utilize vintage or specialized lenses not originally designed for the OM mount. Adapters are readily available for various lens mounts‚ including those from Canon‚ Nikon‚ and Pentax.
However‚ it’s crucial to understand that using adapters may introduce limitations. Full manual operation is often required‚ meaning you’ll need to control aperture and focus manually. Some adapters may also affect image quality or introduce vignetting. When selecting an adapter‚ prioritize quality construction and compatibility with your desired lenses.
Carefully research adapter options and read reviews to ensure optimal performance and avoid potential issues. Adapters expand the OM-1’s versatility‚ but require a degree of technical understanding.
Recommended Accessories for Enhanced Use
To fully unlock the potential of your Olympus OM-1‚ consider several key accessories. A high-quality light meter‚ while the camera has one built-in‚ provides greater accuracy‚ especially in challenging lighting conditions. A variety of Olympus OM-system lenses expands creative options‚ offering different focal lengths and apertures.
A comfortable camera strap is essential for secure handling during extended use. Lens filters‚ such as UV or polarizing filters‚ protect your lenses and enhance image quality. A dedicated camera bag safeguards your equipment during transport and storage.
For advanced techniques‚ explore accessories like extension tubes for macro photography or a remote cable release for long exposures. Investing in these tools elevates your photographic experience with the OM-1‚ allowing for greater control and artistic expression.